How to change the tube in Le Preamp?
This article describes how to change the vacuum tube in the Le Preamp Series preamplifiers.
Chaning the tube is easy and does not void the warranty, but should only be done by a qualified technician, considering the presence of high voltages in the unit. This procedure requires the tube to be cold and the unit disconnected to any power source and other audio or MIDI connection.
If you want to know when or how often the tube needs to be changed, please refer to this other article.
The tube used in Le Preamp is a Ruby 12AX7AC5 HG. You can also use any standard 12AX7 tube as a replacement.
1. Disconnect the power cable and every other connection to the device.
2. Install the device upside-down on a soft, clean and protective surface to avoid scraching the unit.
3. Using a Philips screwdriver, remove the 4 screws retaining the bottom cover.
4. Remove the cover. It can sometimes be stuck and hard to remove. Loosen the 5 X 1/4" jack connectors hex nuts (use a 11mm socket wrench). If needed, you can also use a small flat screwdriver as a lever through the screw holes, again to avoid any scratch on the unit.
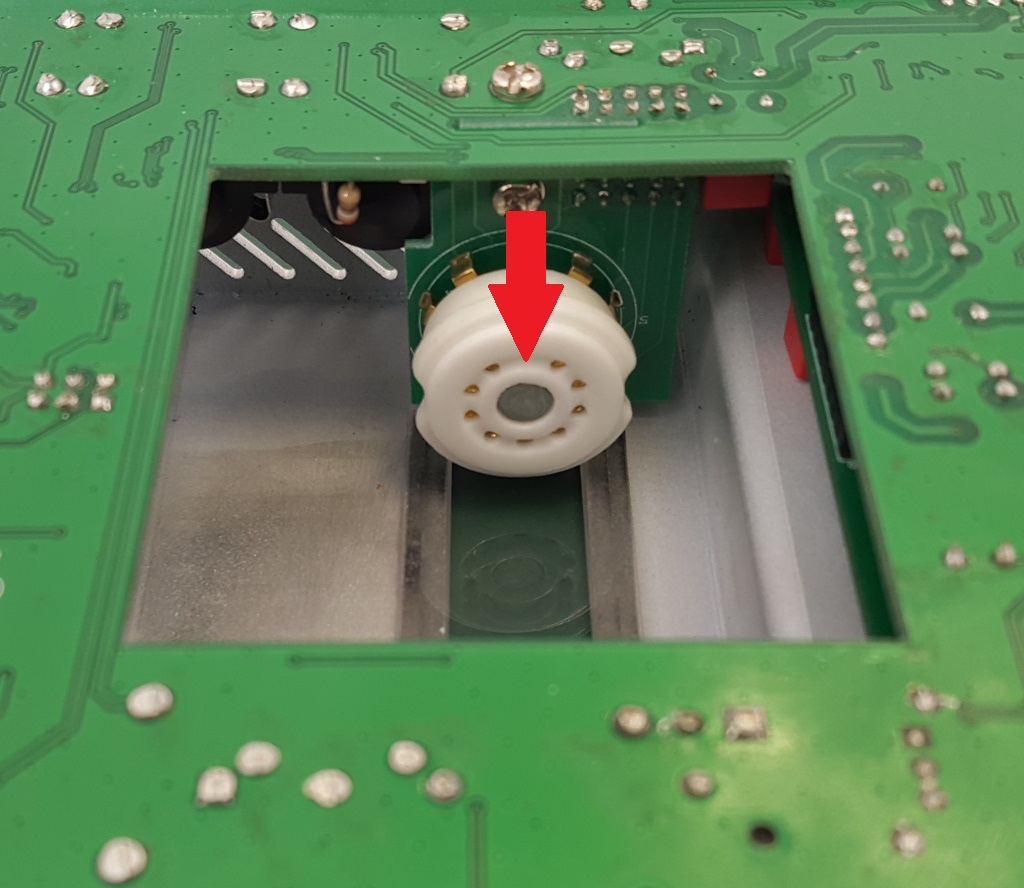
You should now have access to the tube, through the big hole at the center of the PCB (click on the image to enlarge) :
5. Grab the tube, and make it move from side to side while pulling it out of its socket.
6. Before inserting the new tube, locate its missing pin. Insert the tube so as to match this missing pin with the indicated location on the tube socket (click on the image to enlarge) :
7. Install the cover and screw the 4 screws back. If you loosened them, tighten the 5 X 1/4" jack connectors hex nuts back. By hands first, then with a socket wrench (1/8 or 1/4 turn is enough).


